SIM Cards
Overview
The main objective of the platform is to manage the connectivity service and the inventory of SIMs.
Among other things, users can:
- View inventory of SIM cards
- Perform bulk actions
- View usage, locations, call detail records and historical information
- Troubleshoot issues
- Assign attributes
- Assign tags
- Send/receive SMS
List
To view the SIM Cards list click on the SIM Cards section in the left menu and then click on the List option.
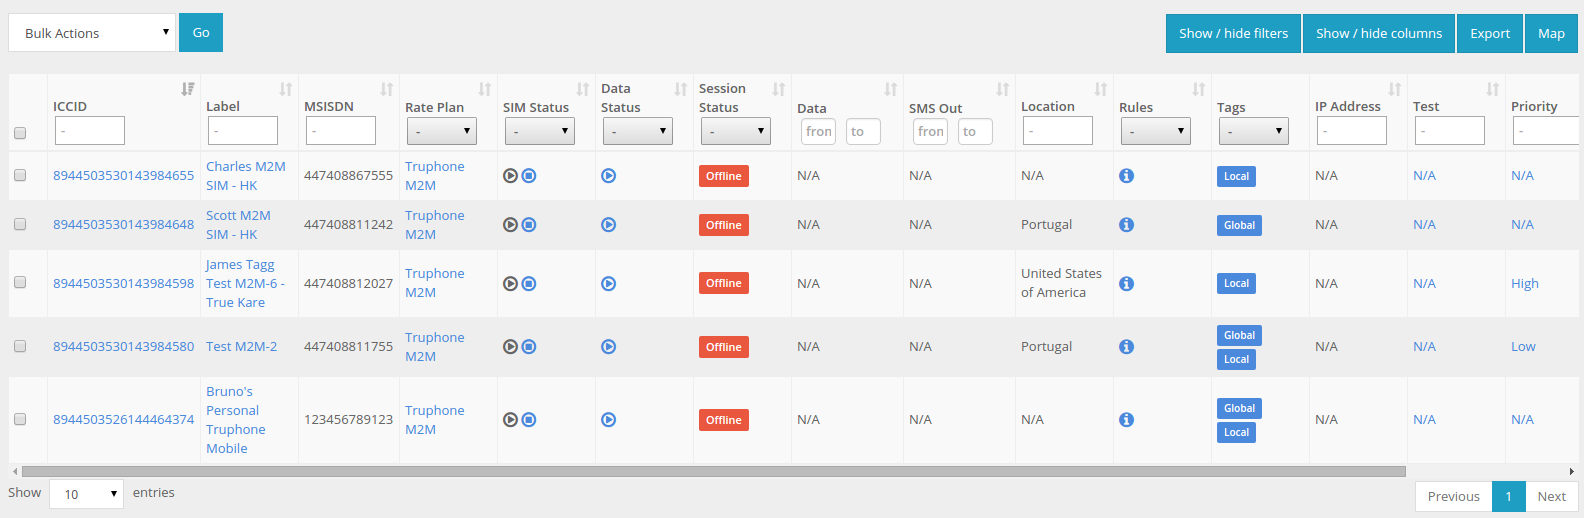
SIM Card list view.
Each row has all of the important information associated with the SIM Cards, such as ICCID, MSISDN, Label, Rate Plan, SIM Card, Data and session Status, Monthly data and SMS usages, last location, tags, attributes, etc.
You can always hide some columns, if you think the table is too big. Some details are hide by default (e.g. Date first registered, IMSI, etc.).
To export the information you can click “Export” and choose the method to export the information, see SIM Cards Export for more information.
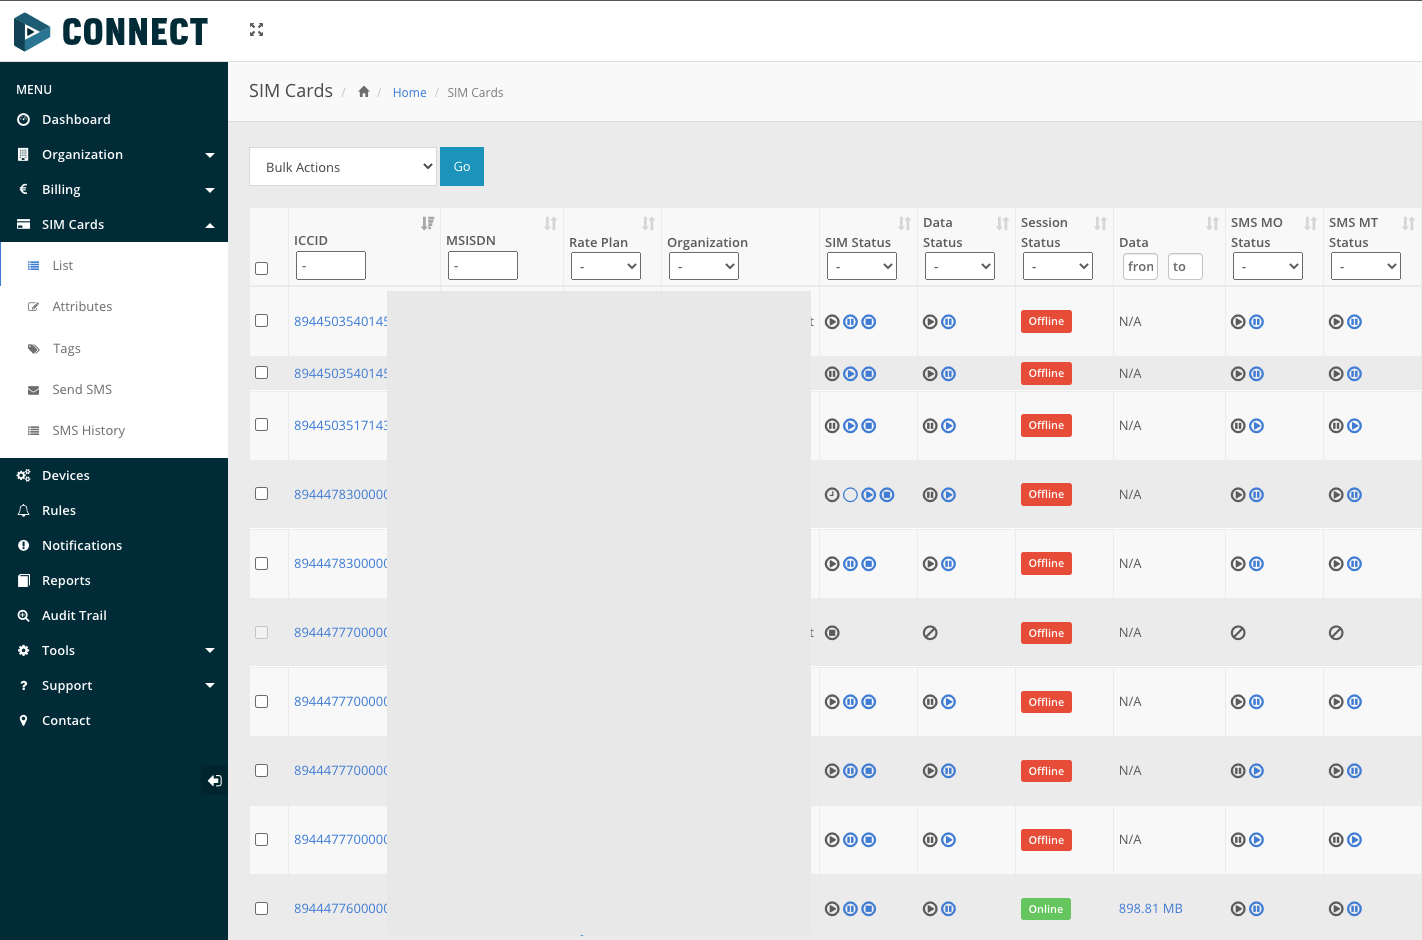
Bulk Actions
The platform allows you to take actions (e.g. change SIM card states, etc.) to several SIM Cards at the same time. To do this, you need to check the desired SIM cards, in the SIM card list, and choose the action to perform in the Bulk Actions select box.
The following action are possible:
- Change Status
- Change Data Status
- Change Tags
- Change Attribute
- Send SMS
Send SMS
Organizations with connectivity plans that include SMS service have the possibility to send SMSs from the IoT Portal to their SIMs from the SIM list. Unlike the Send SMS menu, the SIM list allows filtering for SIMs and easily send an SMS to the selected SIMs.
To send an SMS from the SIM list to a group of selected SIMs, the following steps need to be executed:
Step 1 - Go to SIM list
Head into the SIM list menu, by selecting the option from the left menu bar.
First step - Go to SIM list
In this menu, it is possible to filter for SIMs by applying multiple criteria such as location, online status, tags or SIM status.
Step 2 - Select target SIMs
Once the SIMs have been filtered out, select the SIMs that will be receiving the SMS by checking the checkbox on the left of each SIM entry from the list.
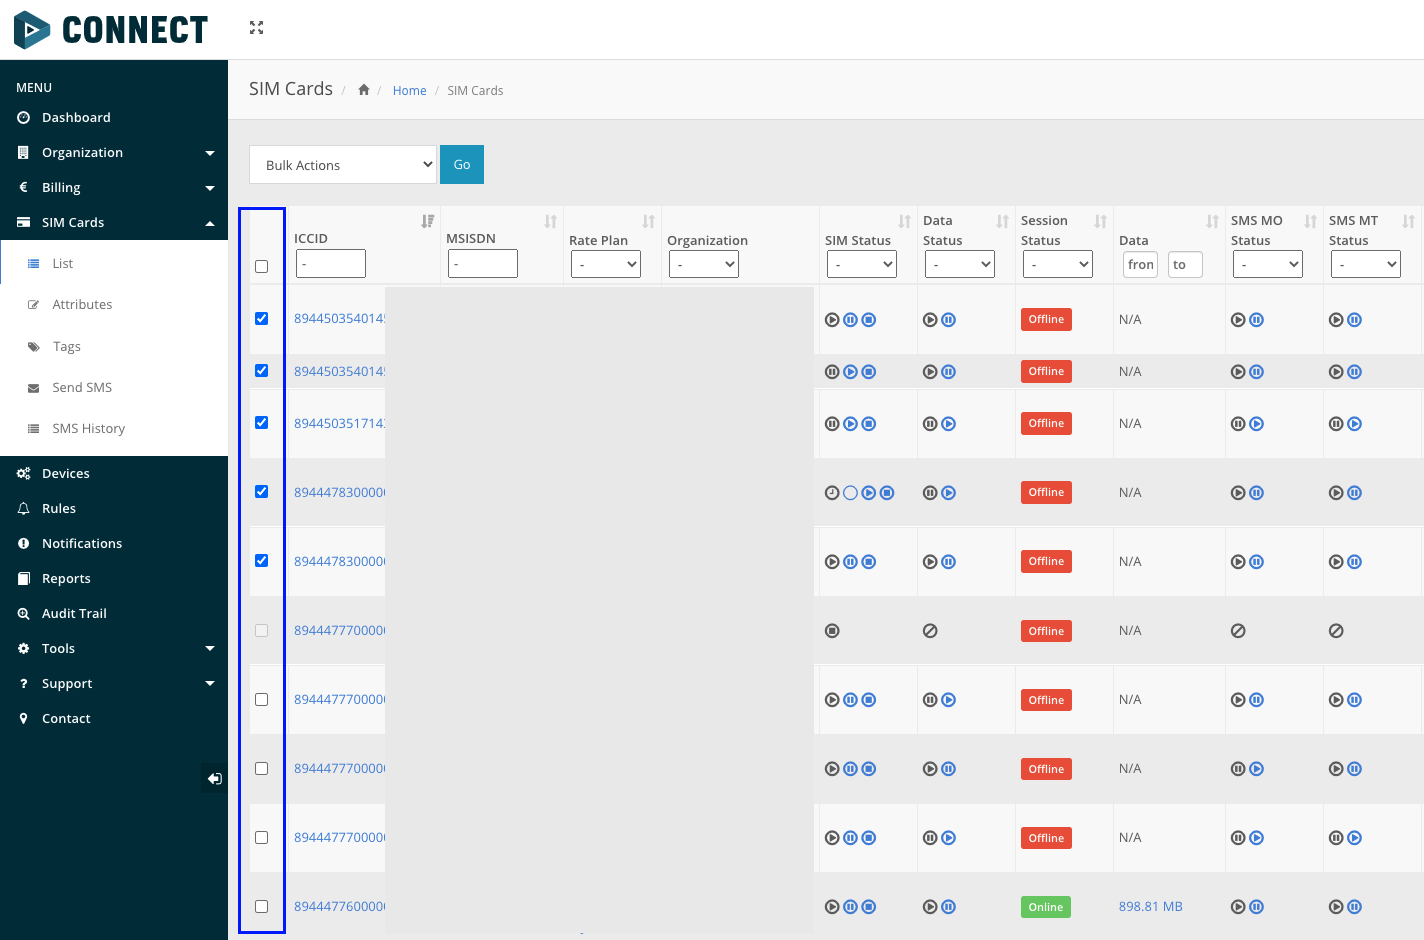
Second step - Select target SIMs
Step 3 - Select bulk action "Send SMS"
On top of the SIM list, select the option "Send SMS" from the Bulk Actions dropdown. A popup form should appear immediatly, if not, click on the button that says "Go", on the right of the Bulk Actions dropdown.

Third step - Select bulk action "Send SMS"
Step 4 - Type in the text to be sent
In the pop-up form that is now on the screen, simply input the text message that will be sent. In the end, select "Send".
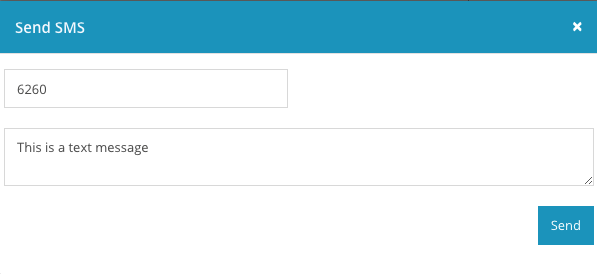
Fourth step - Type in the text to be sent
A message with a green background will show up stating that the message was sent successfully.

SMS sent successfully
All SMSs sent through this method will also be listed in the SMS History menu as well as its current delivery state.
A SIM will only receive the SMS if it is connected, otherwise the platform will queue and retry to send the message from time to time.
SIM Card Details
You can see all of the SIM card details (e.g., ICCID, MSISDNs, Tags, etc.) in a single page, do actions on it (e.g., change state), view the monthly traffic and requests special configurations.
Page
The single page shows all of the SIM Card information. You can edit some of it details (e.g. label, description, attributes, etc. ), to do this, click on the Edit button.
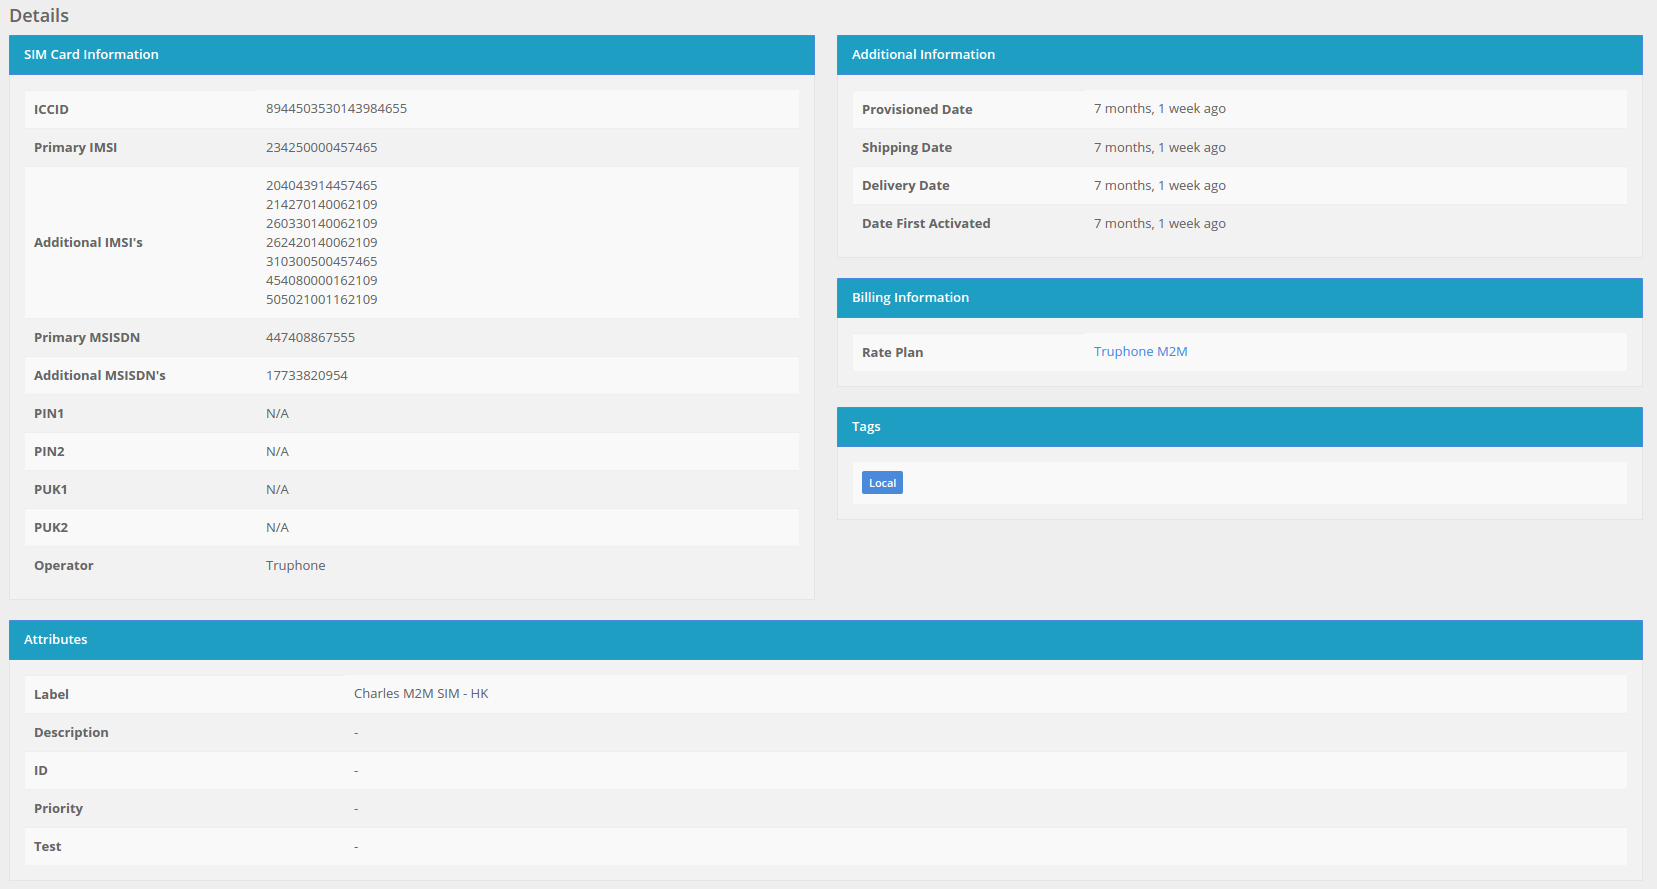
SIM Card details.
Service Status
You also can see the status information of the SIM card, like the SIM card status and data status, current device and last location.
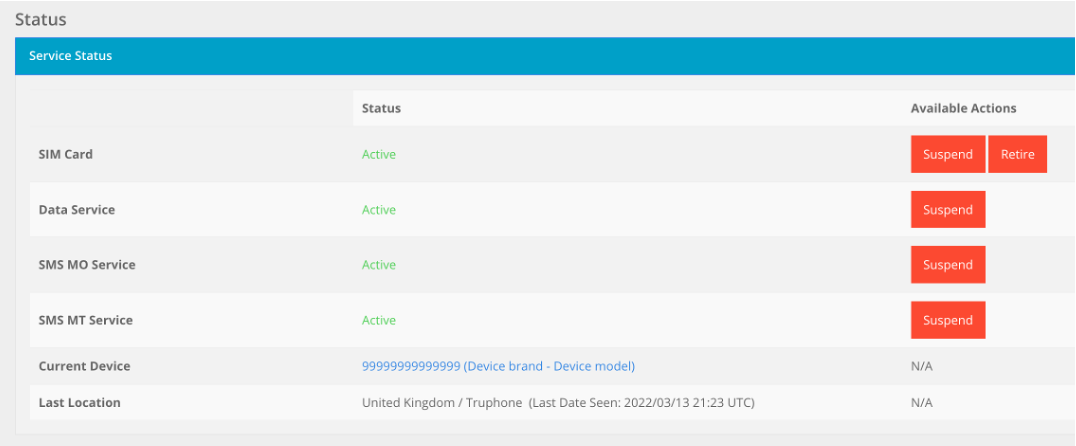
SIM Card status.
Session Status
It is possible to check if a SIM is online, when it started the last session and the current IPv4 in the Ongoing Data Session section. When a SIM is not connected it will show the SIM as being offline otherwise it will be online and with an IP address.

Usage
An overview of the monthly usage or the billing cycle usage can be viewed in the Usage section:
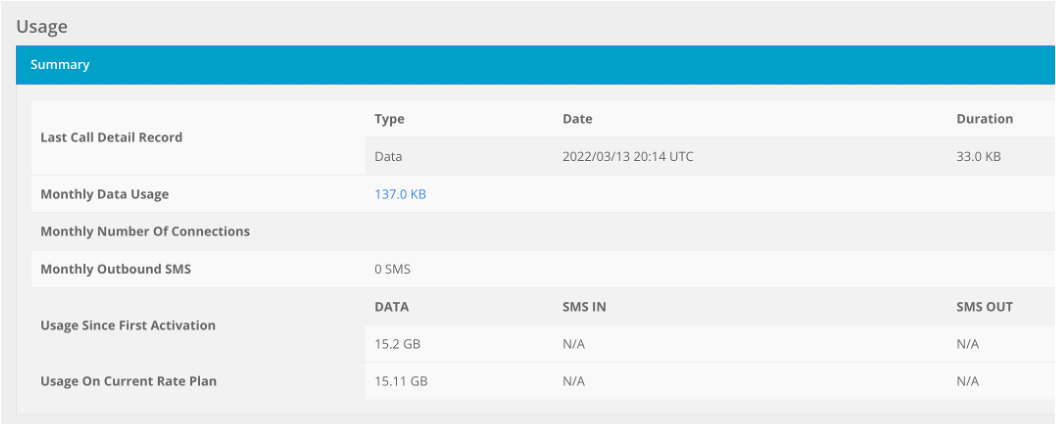
SIM Card usage.
Resources
A 1GLOBAL SIM card/profile has an ICCID and can have multiple MSISDNs and IMSIs depending on the type of connectivity solution. The IoT Portal shows these resources on the SIM details page and can be described as:
- ICCID - SIM profile international identification number
- Primary MSISDN - Primary directory number
- Additional MSISDN - Additional directory numbers
- Primary IMSI - This IMSI is also known as the referrence IMSI and can be used to identify a SIM card in the 1GLOBAL network. It should not be confused with the IMSI that is used in each footprint country
- Additional IMSIs - Additional IMSIs used by the SIM card for network registration depending on the SIM's location
It is also shown along with the above resources all the PINs and PUKs that the SIM has.
History
All history is recorded by the platform from the CDR, to SMS content, notifications, locations updates and rules triggered. The information is shown in dedicated pages.
All the information can be exported. See the SIM Cards Export for detail information.
Timeline
The platform also provides a timeline with all the content related to a SIM card, giving a more friendly view of the SIM card usage. The following image shows a timeline for a SIM card:

SIM Card details timeline.
Life-cycle
Organizations can manage the life-cycle of their SIM Cards, since the day they are provisioned until they are retired. 1GLOBAL also has the ability to Block or Remove SIM cards from the organizations’ accounts.
The next figure shows the SIM cards life cycle and the transitions:
Please note that some states (e.g. Test state) may not be available in your account.

SIM Card life-cycle.
Below is a description of each of the transition actor:
Transition actors
User: Transition performed manually by a user of the account
Operator: Transition performed manually by 1GLOBAL.
Backend: Transition performed automatically by the back-end of the platform. The transition may have been configured by the User (e.g., rules) or by the Operator (e.g., invoices not paid).
Network: Transition performed automatically based on information from the network (e.g., change from Pre-Active to Active once the network detects that the device tried to connect).
Below is a description of each of the states:
States Description
Provisioned: This is the first state of the SIM Cards in the platform. In this state the SIM card will not be able to generate any traffic. From this SIM Card state, the Users (U) and the Operator (O) can use the platform actions to change the SIM card state to Test, Pre-Active, Active or Retire states. The Operator can also Block the SIM card and the Back-end (B) system can Block or Retire the SIM cards if they expire.
Pre-Test: In the Pre-Test state, the network automatically moves the SIM card to Test state on first usage (SMS or data) or when it creates the first data session. The Users and the Operator can move the SIM to Test, Pre-Active or Active states.
Test: The Test state allows the devices to consume some traffic with the SIM Card (e.g. 1MB and 10 SMS) without being charged. The Users and the Operator can change from this state to Provisioning or Retired states. After all the usage is spent, by default the Network (N) changes the SIM card to Provision state but there are some rateplans that can enable the automatic Back-end transition to Pre-Active or Active states. The Back-end system can Retire the SIM card if they expire.
Pre-Active: In the Pre-Active state, the network automatically activates the SIM card on first usage (SMS or data) or when it creates the first data session. The Users and the Operator can Activate the SIM card or Retire it. The Operator and the Backend system can Block the SIM card.
Active: In this state the SIM Card is active and ready to communicate. All traffic in this state is charged. The Users can use the platform actions to Suspend or Retire the SIM card. The Operator and the Back-end system can Suspend, Block or Retire the SIM card.
Suspended: In this state the SIM Card is suspended and cannot communicate. The Users can Activate or Retire the SIM card. The Operator can also Block the SIM card.
Blocked: In this state the SIM card does not communicate. The Users cannot change to any state and only the operator can restore the previous state.
Retired: This is the last state for the organizations users. In this state, the SIM Card is terminated and cannot go back to previous states. The Users can still view all the details and history for that SIM card. The Operator can Remove the SIM card.
Removed: This is the last SIM card state and will no longer be visible by users.
Attributes
The platform attributes feature gives you the option to create attributes to associate with the SIM cards, then you can add a value for that attribute in each SIM card.
To view the attributes list, click on the SIM Cards section in the left menu and then click on the Attributes option.
The following table shows an example for two attributes (Priority and ID):
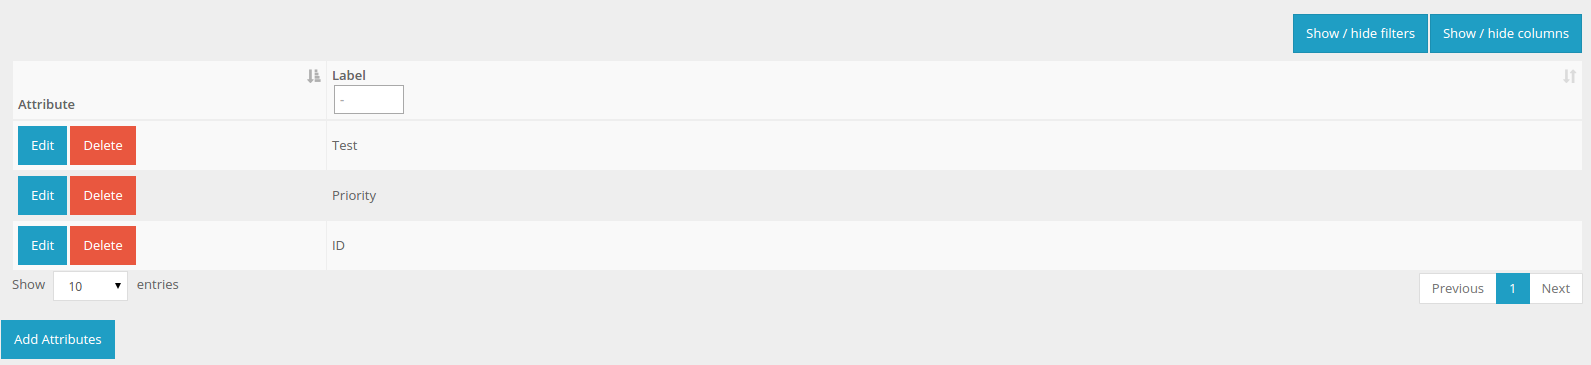
Attributes list view.
To create a new attribute click on the Add Attributes button. For each row, you have the ability to edit or delete it.
Tags
The platform tags feature gives you the option to create tags and associate them across the SIM cards.
To view the tags list, click on the SIM Cards section in the left menu and then click on the Tags option.
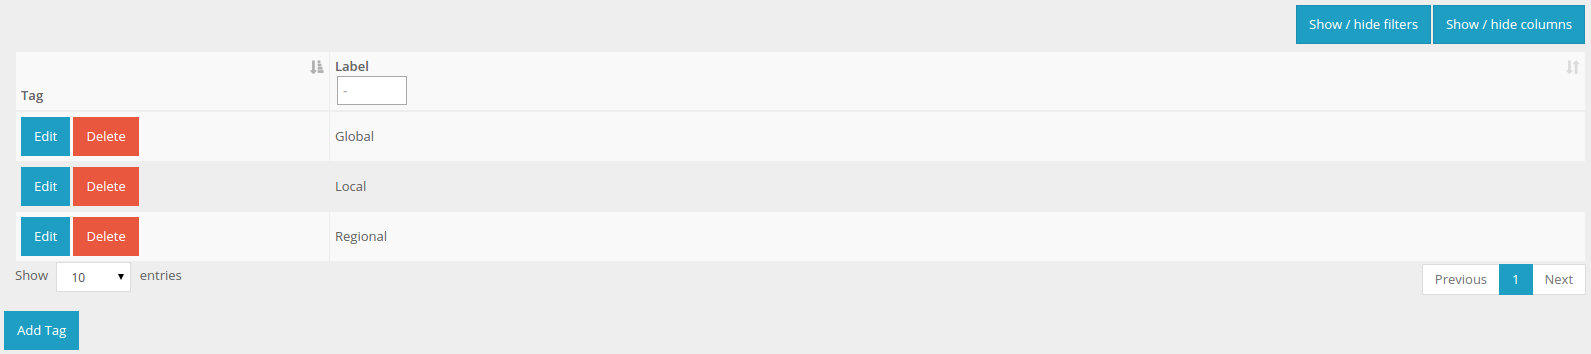
Tags list view.
To create a new tag click on the Add Tag button. For each row, you have the ability to edit or delete it.
When you edit a Tag you can select SIM cards to have it associated.
You can have multiple tags associated to a SIM cards. The following figure of the SIM Card list shows a SIM Card with two tags and another with only one tag.
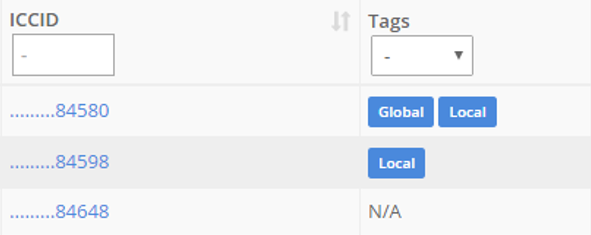
Tags view in the SIM Card list.
Send SMS
Sending SMS from the Portal
The platform allow users to send normal or binary SMS to the devices and accepts incoming SMS, showing the content of each message.
To send SMS, you can click on the SIM Cards section in the left menu and then click on the Send SMS option. When the page is loaded, select the SIM Cards you want to send the SMS and write the message content.
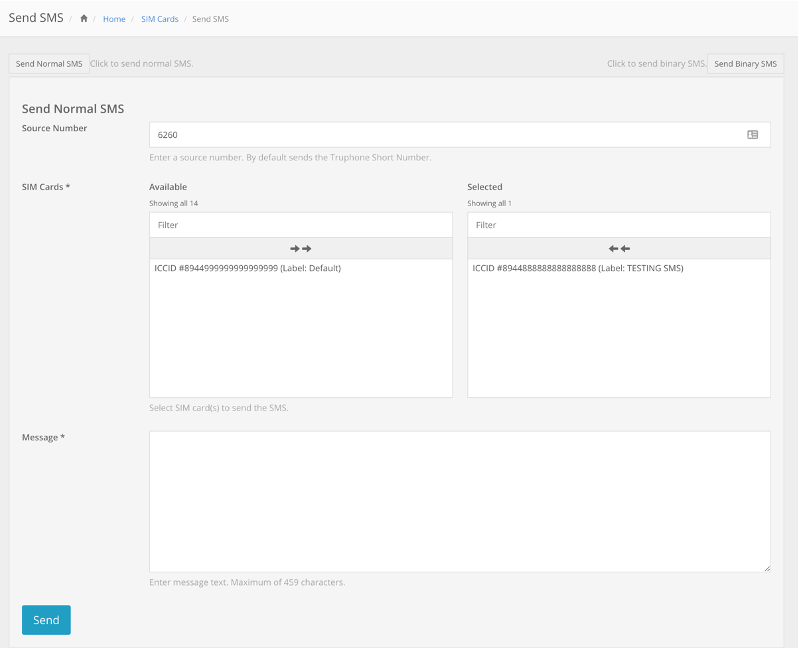
Send SMS form.
After sending the SMS, the history is recorded in the table below.

Send SMS history.
Note that in the history table is only displayed the current month SMS.
Receiving SMS in the Portal
It is also possible to Send SMSs to the portal that can be used as rule triggers. To send an SMS to the portal, the destination number must be 6260. These SMSs can also be seen in the SMS history.
IoT Portal short number is 6260 and is only available for SIMs available in the IoT Portal
Call Detail Records
IoT Portal provides a feature to view usage and related call detail records. This feature works independently of the FTP setup which means that all CDRs are accounted for even when there is no FTP setup. This feature is available through the "Call Detail Records" button from the SIM details page:

Call Detail Records button
The data usage displayed in each line is related to a full data session (from create session event to end session event) and shows the total usage rounded to the next kB. See the following examples for more details:
Example 1
- Total session usage in bytes: 1738
- Total session usage as shown in IoT Portal: 2kB
Example 2
- Total session usage in bytes: 3341469
- Total session usage as shown in IoT Portal: 3.19 MB
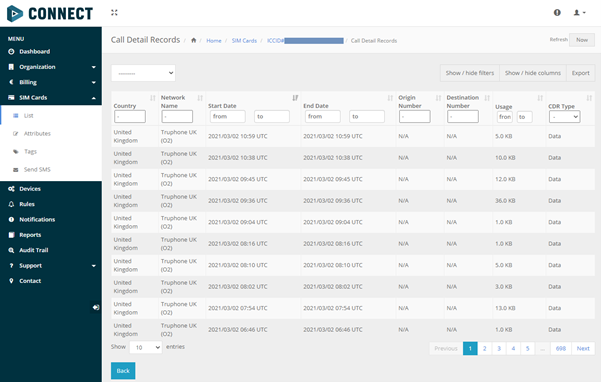
Call Detail Records screen